> ## Documentation Index
> Fetch the complete documentation index at: https://docs.a2v2.ai/llms.txt
> Use this file to discover all available pages before exploring further.
# Contacts
> View, add, and organize the people who talk to your agent — with notes, files, and their full chat history in one place.
A lead chatted with your agent yesterday and left their email. Today you want to
follow up: check what they asked, jot down what to say, and attach the quote you
prepared. **Contacts** is where all of that lives — one record per person, with their
details, your notes, their files, and the conversations they had.
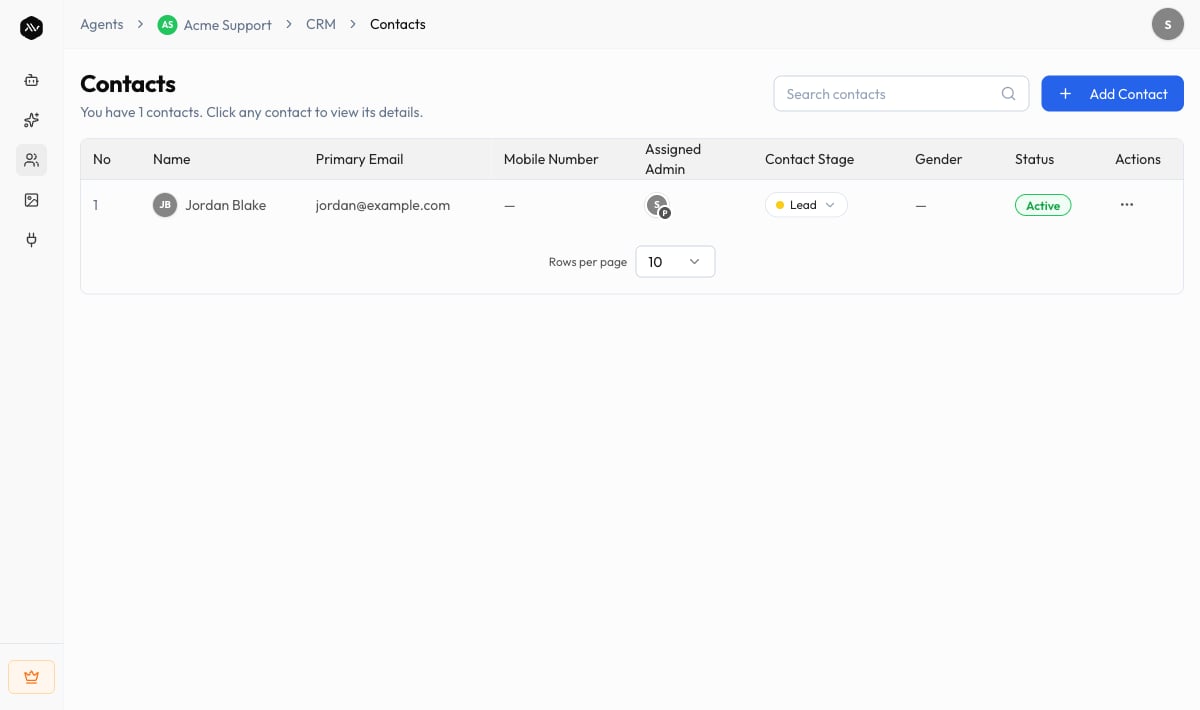
Open your agent and choose **CRM → Contacts** in the sidebar. The page is titled
**Contacts**, with the subtitle "You have *N* contacts. Click any contact to view its
details."
## Prerequisites
* An agent (see [Create an agent](/building/create-agent)).
* Contacts arrive on their own once people chat with a [live](/embed/visibility) agent,
or you can add them yourself.
## The contacts list
Each row in the list shows the columns **Name**, **Primary Email**, **Mobile Number**,
**Gender**, and **Status**. Use **Search contacts** to find someone by name. Before you
have any, the list reads "No contacts yet. Add your first contact to get started."
 ## Add a contact
Go to **CRM → Contacts** and select **Add Contact**.
A dialog asks you to "Select how you want to add contact":
* **Add a Single Person** — "Manually add new users, one at a time."
* **CSV** — "Import a list of people from other system with a CSV file."
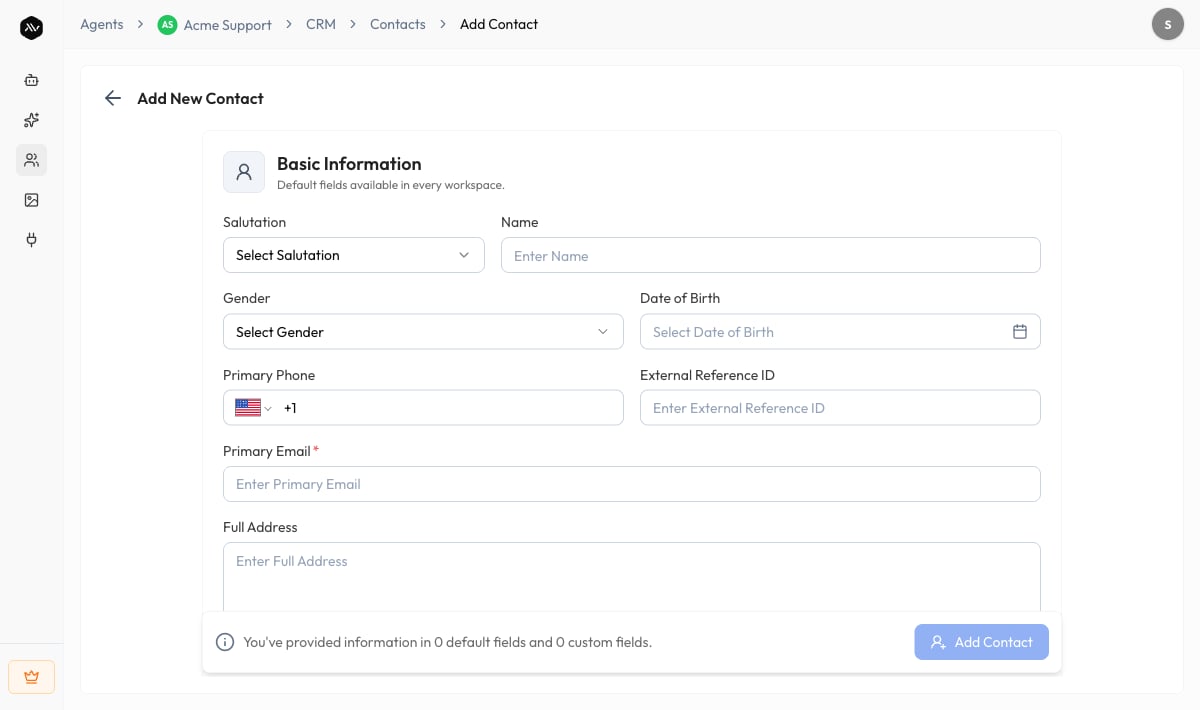
For a single person, the **Add New Contact** form opens with a **Basic Information**
section ("Default fields available in every workspace") — **Name**, **Email ID**,
and **Mobile Number** — plus any **Custom Fields** you've created. You must add at
least an email or a phone number.
## Add a contact
Go to **CRM → Contacts** and select **Add Contact**.
A dialog asks you to "Select how you want to add contact":
* **Add a Single Person** — "Manually add new users, one at a time."
* **CSV** — "Import a list of people from other system with a CSV file."
For a single person, the **Add New Contact** form opens with a **Basic Information**
section ("Default fields available in every workspace") — **Name**, **Email ID**,
and **Mobile Number** — plus any **Custom Fields** you've created. You must add at
least an email or a phone number.
 Select the create action. A2V2.ai checks for duplicates as you type and warns "A
user with similar details already exists" so you don't create the same person twice.
Most of your contacts shouldn't need the **Add Contact** button at all — a well-set-up
agent captures them from conversations automatically. Use manual add and CSV import to
seed your existing list or add the occasional contact who reached you another way.
## View a contact
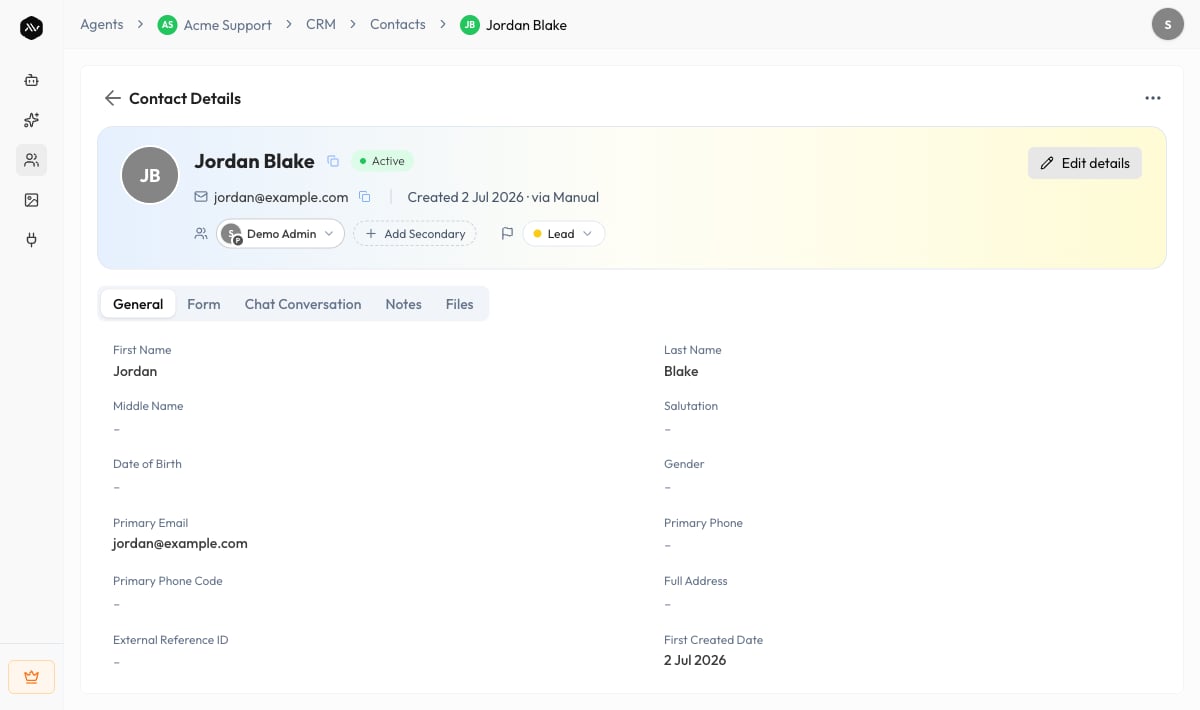
Click any contact to open **Contact Details**. The header banner shows their name,
**Owner**, **Stage**, and **Status**, plus quick actions to copy their name, email, or
phone. The details are organized into tabs:
| Tab | What's there |
| --------------------- | ------------------------------------------------------------------------------------------------------- |
| **General** | The contact's standard and custom field values. Select **Edit details** to change them. |
| **Form** | Form submissions tied to this contact (see [Forms](/crm/forms)). |
| **Chat Conversation** | Every conversation this contact had with your agent — "Click on any conversation to view it in detail." |
| **Notes** | Your internal notes about this contact (below). |
| **Files** | Documents you've uploaded for this contact (below). |
**Medical** agents add **Health** and **Prescriptions** tabs for clinical use. Those
are covered separately and aren't part of the standard CRM.
### Owner, stage, and status
* **Owner** — the team member responsible for the contact. You can set a **Primary** and
an optional **Secondary** admin, or have [Automations](/crm/automations) assign them.
* **Stage** — where the contact sits in your pipeline: **Lead**, **Prospect**,
**Customer**, or **Old Customer**. Move a contact forward or back as the relationship
changes.
* **Status** — **Active** or **Inactive**. Marking a contact inactive ("Hide … from
active contacts?") keeps all their data and history intact and hides them from your
active list; you can reactivate anytime.
## Notes
Notes are your private, internal record about a contact — what was discussed, what to do
next, anything your team should know. They're never shown to the contact.
On a contact, select the **Notes** tab, then **Add Note**.
Give it a **Title** and **Content**. The editor supports rich text, so you can
format the note with headings, lists, and emphasis. Titles can be up to 200
characters and content up to 3,000.
Select the create action. A2V2.ai checks for duplicates as you type and warns "A
user with similar details already exists" so you don't create the same person twice.
Most of your contacts shouldn't need the **Add Contact** button at all — a well-set-up
agent captures them from conversations automatically. Use manual add and CSV import to
seed your existing list or add the occasional contact who reached you another way.
## View a contact
Click any contact to open **Contact Details**. The header banner shows their name,
**Owner**, **Stage**, and **Status**, plus quick actions to copy their name, email, or
phone. The details are organized into tabs:
| Tab | What's there |
| --------------------- | ------------------------------------------------------------------------------------------------------- |
| **General** | The contact's standard and custom field values. Select **Edit details** to change them. |
| **Form** | Form submissions tied to this contact (see [Forms](/crm/forms)). |
| **Chat Conversation** | Every conversation this contact had with your agent — "Click on any conversation to view it in detail." |
| **Notes** | Your internal notes about this contact (below). |
| **Files** | Documents you've uploaded for this contact (below). |
**Medical** agents add **Health** and **Prescriptions** tabs for clinical use. Those
are covered separately and aren't part of the standard CRM.
### Owner, stage, and status
* **Owner** — the team member responsible for the contact. You can set a **Primary** and
an optional **Secondary** admin, or have [Automations](/crm/automations) assign them.
* **Stage** — where the contact sits in your pipeline: **Lead**, **Prospect**,
**Customer**, or **Old Customer**. Move a contact forward or back as the relationship
changes.
* **Status** — **Active** or **Inactive**. Marking a contact inactive ("Hide … from
active contacts?") keeps all their data and history intact and hides them from your
active list; you can reactivate anytime.
## Notes
Notes are your private, internal record about a contact — what was discussed, what to do
next, anything your team should know. They're never shown to the contact.
On a contact, select the **Notes** tab, then **Add Note**.
Give it a **Title** and **Content**. The editor supports rich text, so you can
format the note with headings, lists, and emphasis. Titles can be up to 200
characters and content up to 3,000.
 Saved notes appear in a table with **Title**, **Author**, **Created Date**, and
**Last Updated**. Use **View**, **Edit Note**, or **Delete Note** from the row.
Search existing notes with **Search Notes**. With none yet, the tab reads "No notes
yet — Click '+ Add Note' to create your first note."
## Files
Attach documents to a contact — a signed agreement, an ID, a quote, an intake PDF.
On a contact, open the **Files** tab and select **Upload File**. Each file can be up
to **10MB**.
Files list with **File Name**, **Type**, **Size**, and **Date**. Use the row actions
to **Download** or **Delete**.
Supported types include PDF, DOC, DOCX, XLS, XLSX, TXT, CSV, and common images (JPEG,
PNG, GIF, WEBP), plus ZIP and RAR archives.
Deleting a contact, note, or file is permanent and can't be undone. To take a contact
out of your active list without losing their data, mark them **Inactive** instead.
## Troubleshooting
The agent only fills in a field during a conversation if that field has **Allow for
AI** enabled, and it needs at least an email or phone number to create a contact.
Check your [custom fields](/crm/custom-fields) and that the standard contact fields
are AI-enabled.
A2V2.ai warns about likely duplicates when you add a contact, but you can still
create one. Open the existing contact instead, or delete the duplicate. Email and
phone are used as key identifiers for matching.
Files are capped at 10MB each. For larger documents, compress the file or split it
before uploading.
They may have been marked **Inactive**. Inactive contacts are hidden from the active
list but keep all their data — reactivate them from the contact's banner.
## Related
Capture more than name and email — and let the agent fill it in.
Collect structured information and attach it to contacts.
Auto-assign an owner and starting stage to every new contact.
Read the conversations behind each contact.
Saved notes appear in a table with **Title**, **Author**, **Created Date**, and
**Last Updated**. Use **View**, **Edit Note**, or **Delete Note** from the row.
Search existing notes with **Search Notes**. With none yet, the tab reads "No notes
yet — Click '+ Add Note' to create your first note."
## Files
Attach documents to a contact — a signed agreement, an ID, a quote, an intake PDF.
On a contact, open the **Files** tab and select **Upload File**. Each file can be up
to **10MB**.
Files list with **File Name**, **Type**, **Size**, and **Date**. Use the row actions
to **Download** or **Delete**.
Supported types include PDF, DOC, DOCX, XLS, XLSX, TXT, CSV, and common images (JPEG,
PNG, GIF, WEBP), plus ZIP and RAR archives.
Deleting a contact, note, or file is permanent and can't be undone. To take a contact
out of your active list without losing their data, mark them **Inactive** instead.
## Troubleshooting
The agent only fills in a field during a conversation if that field has **Allow for
AI** enabled, and it needs at least an email or phone number to create a contact.
Check your [custom fields](/crm/custom-fields) and that the standard contact fields
are AI-enabled.
A2V2.ai warns about likely duplicates when you add a contact, but you can still
create one. Open the existing contact instead, or delete the duplicate. Email and
phone are used as key identifiers for matching.
Files are capped at 10MB each. For larger documents, compress the file or split it
before uploading.
They may have been marked **Inactive**. Inactive contacts are hidden from the active
list but keep all their data — reactivate them from the contact's banner.
## Related
Capture more than name and email — and let the agent fill it in.
Collect structured information and attach it to contacts.
Auto-assign an owner and starting stage to every new contact.
Read the conversations behind each contact.