Prerequisites
- You must be the organization Owner to change the plan or manage billing.
- Subscribing and upgrading happen through Stripe — see Checkout & billing portal.
The plans
A2V2.ai offers four tiers. Each is sized for a different stage of growth:| Plan | Best for |
|---|---|
| Free | Individual creators, small YouTubers, or those just getting started. |
| Starter | Individual creators, small YouTubers, or those just getting started. |
| Pro | Growing channels, small businesses, or creators with more content. |
| Enterprise | Large businesses, agencies, or creators with complex content needs. |
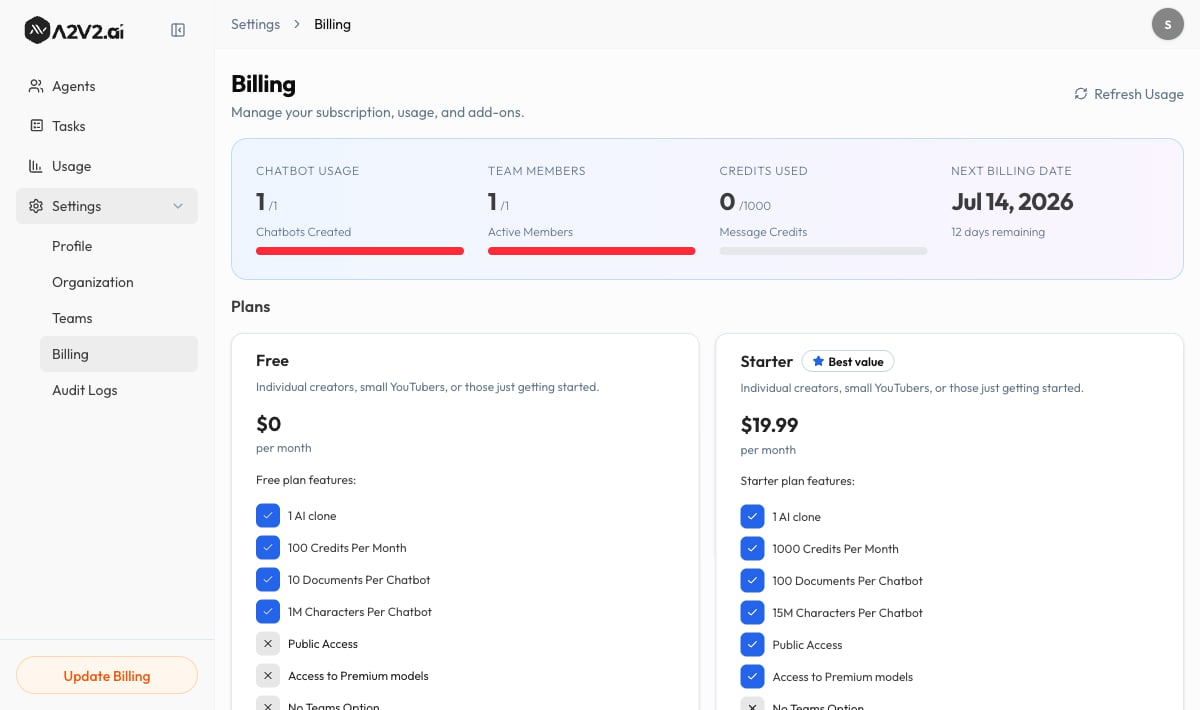
What a plan includes
Each plan card lists its features. The dimensions that change between tiers are:| Feature | What it controls |
|---|---|
| Credits Per Month | Your monthly plan-credit allowance for messages, document processing, and voice. See Credits explained. |
| AI clone(s) | How many agents you can run. |
| Documents Per Chatbot | How many sources each agent’s knowledge base can hold (higher tiers offer Unlimited Documents Per Chatbot). |
| Characters Per Chatbot | The total amount of trained content per agent. |
| Team members | How many people can join your organization (lower tiers show No Teams Option; others allow Up to 3 or more). |
| Premium models | Whether you get Access to Premium models for higher-quality answers. |
| Public Access | Whether agents can be made publicly available to visitors. |
Exact credit allowances, character limits, and prices are shown live on each plan
card and may change. Always confirm the current numbers on the Plans tab
before subscribing.
The trial
New subscriptions can start with a free trial. While you’re in it, the app shows how long you have left — for example, “Trial ends in 7 days”. A trial converts to a paid subscription automatically when you add a payment method through checkout. If the trial ends without a valid payment method on file, your organization moves back to the Free plan — your data stays, but paid features and your higher credit allowance pause until you subscribe.Change or downgrade your plan
You can move between plans at any time from the Plans tab:Confirm in checkout
Upgrades take you to Stripe checkout to confirm payment. See
Checkout & billing portal.
Troubleshooting
I don't see the option to change plans
I don't see the option to change plans
Only the organization Owner can manage plans and billing. Ask your owner
to make the change, or have them transfer ownership.
My plan dropped to Free unexpectedly
My plan dropped to Free unexpectedly
This usually means a trial ended without a payment method, or a payment didn’t
go through. Open Checkout & billing portal to
update your payment method and re-subscribe. Your content is preserved.
I need more agents but not a bigger plan
I need more agents but not a bigger plan
Buy extra agent or team-member slots as add-ons instead of
upgrading the whole tier.
Related
Credits explained
What credits are and what spends them.
Checkout & billing portal
Subscribe and manage payment details.
Add-ons
Buy extra agents and team-member seats.
Auto-recharge
Never run out of credits mid-rush.