Prerequisites
- An agent that’s tested and ready (see Sandbox).
- Access to edit your website’s HTML (for the iframe and chat bubble options).
In the snippets below,
<AGENT_ID> is filled in automatically for your agent —
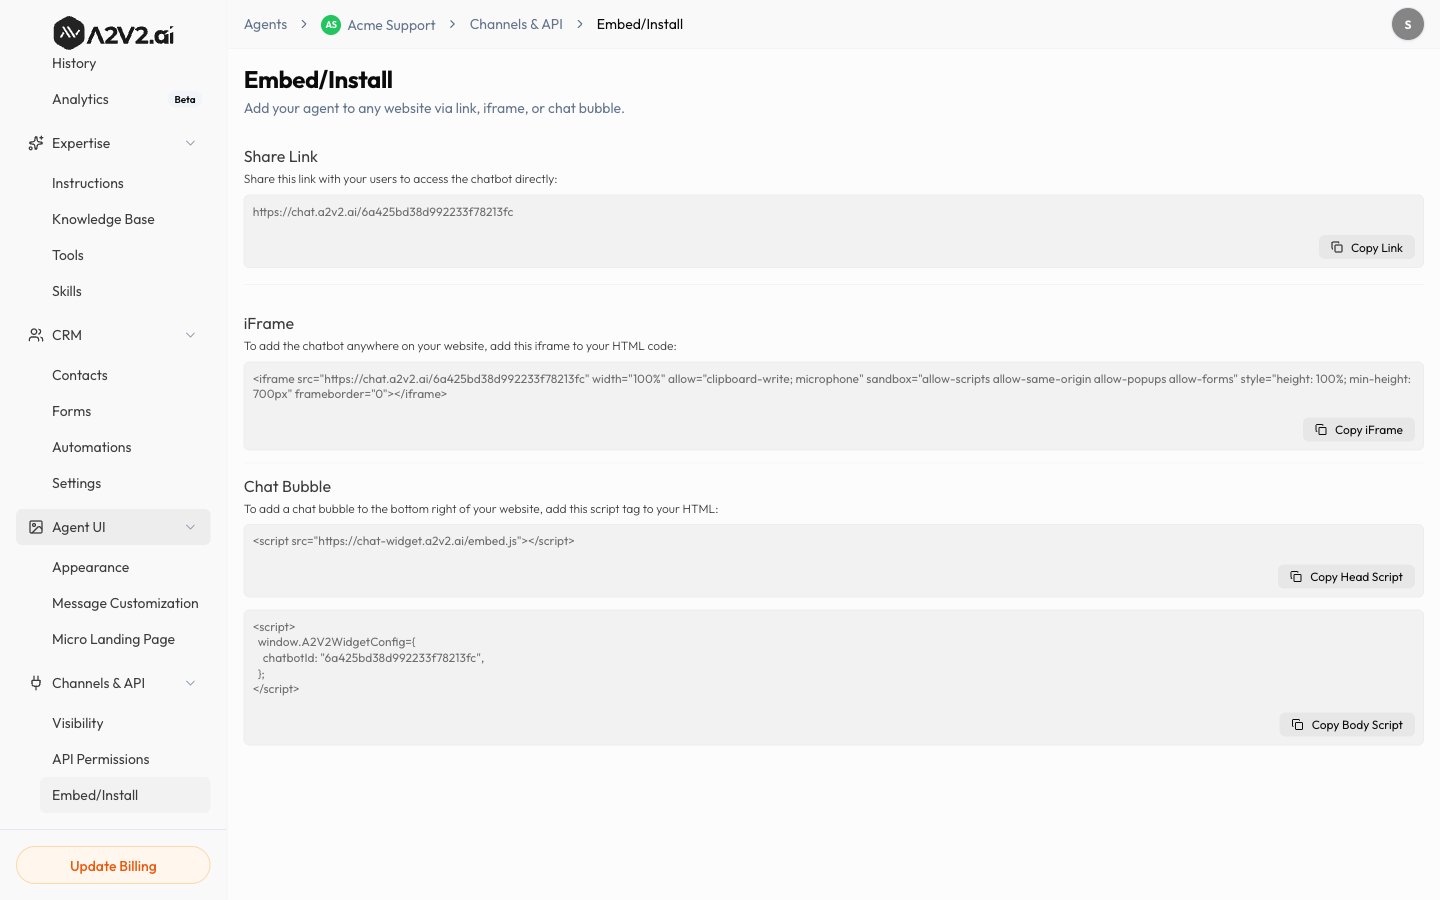
copy the snippet directly from the Embed/Install screen rather than retyping
it.Option 1 — Share Link
The fastest way to share your agent: a hosted page you can send in an email, link from a button, or post anywhere — no code required.Option 2 — Chat bubble (recommended)
A floating button in the corner of your site that opens the chat when clicked. This option comes in two parts.The widget loads inside an isolated container (a Shadow DOM), so it won’t clash
with your site’s styles, and it won’t be affected by them.
Option 3 — Inline iframe
Embed the chat directly inside a page (for example, a dedicated “Help” page). Copy the<iframe> snippet and place it in your page’s HTML where the chat should
appear.
Which should I use?
| Use the… | When you want… |
|---|---|
| Share Link | To send your agent as a link, with nothing to install. |
| Chat bubble | A site-wide assistant available on every page. |
| Inline iframe | The chat embedded into a specific page or layout. |
Tips
Troubleshooting
The bubble doesn't appear
The bubble doesn't appear
Confirm the snippet is before
</body>, that chatbotId is present, and that
your site doesn’t strip <script> tags. Check the browser console for errors.Fonts or styling look off on my site
Fonts or styling look off on my site
The widget loads its own font and isolates its styles. If your site enforces a
strict Content-Security-Policy, allow the widget’s font/script sources.
Updates aren't showing
Updates aren't showing
Your site or CDN may be caching the page. Hard-refresh, and clear any
site/CDN cache after embedding.